Homemade Yogurt
If you take a spin through the Internet, you will find a lot of different yogurt-making instructions, using all types of gadgets and equipment. Pots, double-boilers, thermometers, crock pots, towels, jars, pressure cookers, heading pads, and honest-to-goodness yogurt makers. Here is just a sampling of some of the recipes I read:
I purchased one litre of Avalon milk from Sunnyside Market (in Kensington). It comes in a glass bottle with a plastic cap. The bottles are returnable; you pay a deposit which is refunded when you bring the bottle back to the store. I eat yogurt pretty much every weekday, so I tend to have it on hand. It was the plain, all natural variety with active cultures, which I bought at Sunnyside. I noticed that they also sell powdered yogurt starter there, but I don't plan on trying it.
Here is roughly what I did to make my first batch of yogurt:
In its thin form, I ended up with nearly a litre of yogurt, which was pretty great. However, I wanted to try straining it just to see what the results would be. I draped a cheesecloth over a bowl, poured on the yogurt, bundled up the edges, and held the whole deal over the bowl. A surprising amount of water poured out of the cheese cloth and I was left with only about half a litre of yogurt, which was much thicker.
I'm pretty happy with how this went, although I think there are a few things I need to improve on next time.
- http://www.makeyourownyogurt.com/
- http://zerowastehome.blogspot.ca/2010/03/zero-waste-recipes.html
- http://www.macheesmo.com/2011/04/crockpot-yogurt/
- Retain 1/4 cup of a previous batch or container of yogurt, as long as it is a type that has active cultures. Plain is best. Take it out so it approaches room temperature while you do the next steps.
- Bring four cups of milk to 185 degrees Fahrenheit slowly and being careful not to burn it.
- Cool the milk to 110 - 120 degrees.
- Add your yogurt to the milk and stir it together.
- Keep the mixture at 110 - 120 degrees for 4 to 7 hours.
- You have yogurt! Some recipes say to strain it, some don't.
I purchased one litre of Avalon milk from Sunnyside Market (in Kensington). It comes in a glass bottle with a plastic cap. The bottles are returnable; you pay a deposit which is refunded when you bring the bottle back to the store. I eat yogurt pretty much every weekday, so I tend to have it on hand. It was the plain, all natural variety with active cultures, which I bought at Sunnyside. I noticed that they also sell powdered yogurt starter there, but I don't plan on trying it.
Here is roughly what I did to make my first batch of yogurt:
- Took out 1/4 cup of yogurt and let it sit in the measuring cup on the counter.
- Set the oven to preheat to the lowest setting (170 degrees) and turned on the oven light.
- Heated the litre of milk in a pot on the stove to 185 degrees, using a thermometer to monitor the temp.
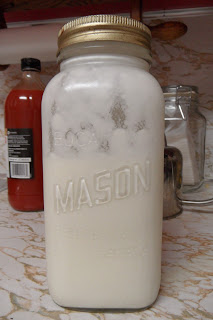
- Poured the hot milk into a washed mason jar.
- Waited for the milk to cool to 110 degrees.
- Added the yogurt starter and stirred.
- Turned off the oven but left the light on.
- Put the mason jar in the oven. When putting it in, I opened the door all the way to let some heat out, since 170 degrees is too hot.
- Left it over night.
In its thin form, I ended up with nearly a litre of yogurt, which was pretty great. However, I wanted to try straining it just to see what the results would be. I draped a cheesecloth over a bowl, poured on the yogurt, bundled up the edges, and held the whole deal over the bowl. A surprising amount of water poured out of the cheese cloth and I was left with only about half a litre of yogurt, which was much thicker.
I'm pretty happy with how this went, although I think there are a few things I need to improve on next time.
- I don't have a clip for my thermometer, so I had to hold it in the pot to measure. As a result, I think my temperatures were inaccurate, and the milk got too hot.
- I burned the milk a little bit on the bottom. A DIY double-boiler could avoid this.
- It took forever to cool. Next time I may cool it in a water bath.


Comments
Post a Comment